Categories
 Profile
 Contacts
 Notes & Cloud Files
 CRM
CRM Billing
 Quote Flow
 Tasks
Tasks ClockEase & Payroll
 Phone Hub
 Booking Hub
 Fleet Hub
 HireFlow
 Cybix AI
 Connect
 Administration
 Sales & Operations
 Video Meeting
- Cybix App
- About the development company.
- About my Membership
-
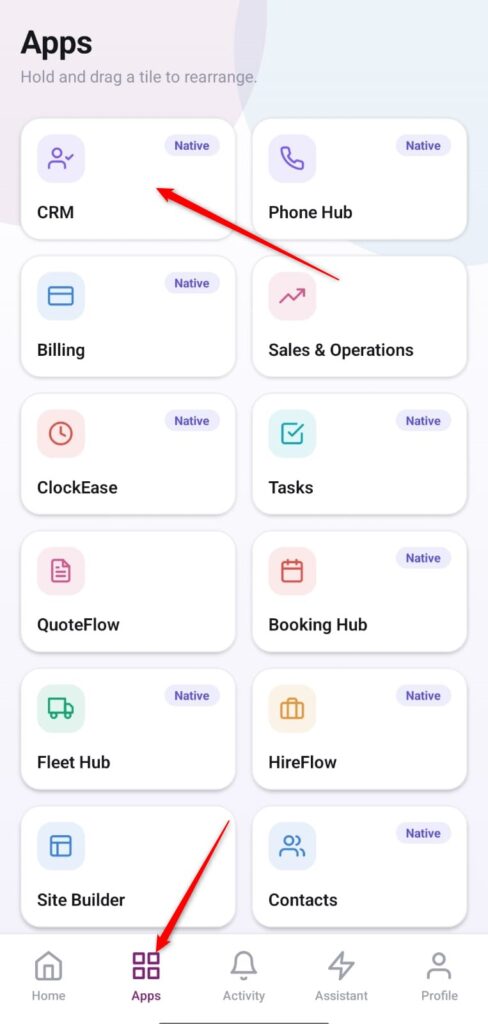
Open the App Directory: On the bottom navigation bar of the application, tap the Apps menu button represented by the four-square layout icon.
-
Access the CRM Workspace: Within the active tools grid list, locate and tap the CRM module card.
-
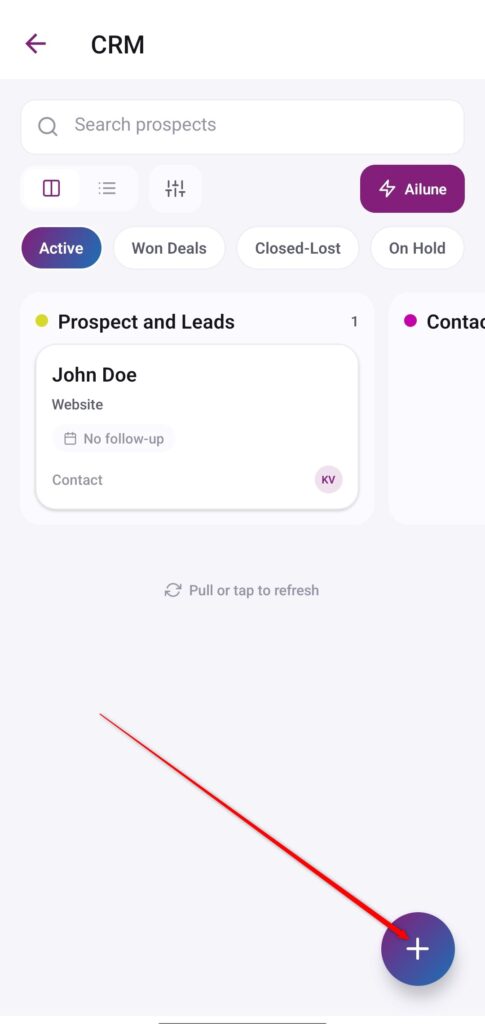
Launch a New Prospect Form: From your main pipeline board dashboard layout, tap the purple floating action button featuring the
+icon situated in the bottom right corner.
-
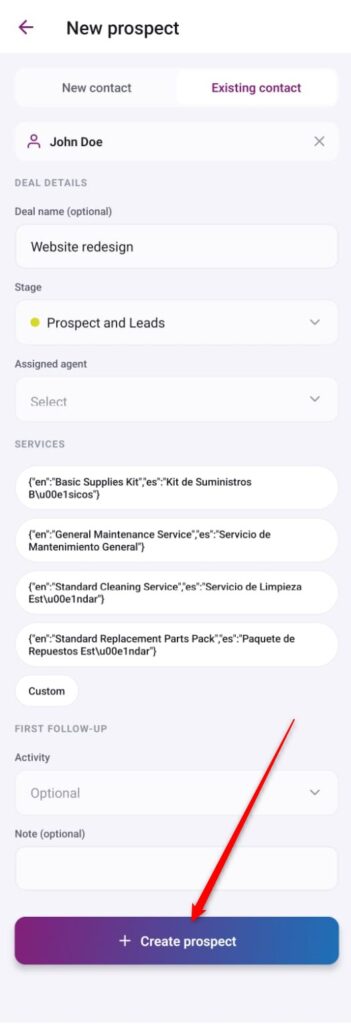
Link a Contact Profile: At the top of the creation canvas screen, choose whether you want to register a brand new customer entry (New contact) or choose an existing entry (Existing contact) from your active business pipeline directory (e.g., John Doe).
-
Fill in Deal Details: Input your target operational metrics inside the data fields:
-
Deal name (optional): Enter a clear, traceable headline context for the contract or request (such as Website redesign).
-
Stage: Select the matching active progression stage mapping indicator using the dropdown selector menu.
-
Assigned agent: Use the menu selection row to choose which specialized corporate team member will manage the business entry tracking operations.
-
-
Select Target Services: Under the SERVICES block area, check or tap the target services pills corresponding to the commercial deal configuration, or use the Custom pill element tool to define an individual field entry parameter manually.
-
Schedule the First Follow-up: Scroll down to the bottom form segment to pick your introductory tracking Activity timestamp template from the picker dropdown and add any extra logging documentation variables in the Note (optional) text area.
-
Commit and Deploy the Entry: Review all your typed setup information parameters across the mobile view and tap the prominent purple action button at the bottom labeled
+Create prospect to save the entry profile.