Categories
 Profile
 Contacts
 Notes & Cloud Files
 CRM
CRM Billing
 Quote Flow
 Tasks
Tasks ClockEase & Payroll
 Phone Hub
 Booking Hub
 Fleet Hub
 HireFlow
 Cybix AI
 Connect
 Administration
 Sales & Operations
 Video Meeting
- Cybix App
- About the development company.
- About my Membership
Follow this structural workflow to successfully set up and deploy a brand-new appointment or corporate booking page from your mobile interface:
-
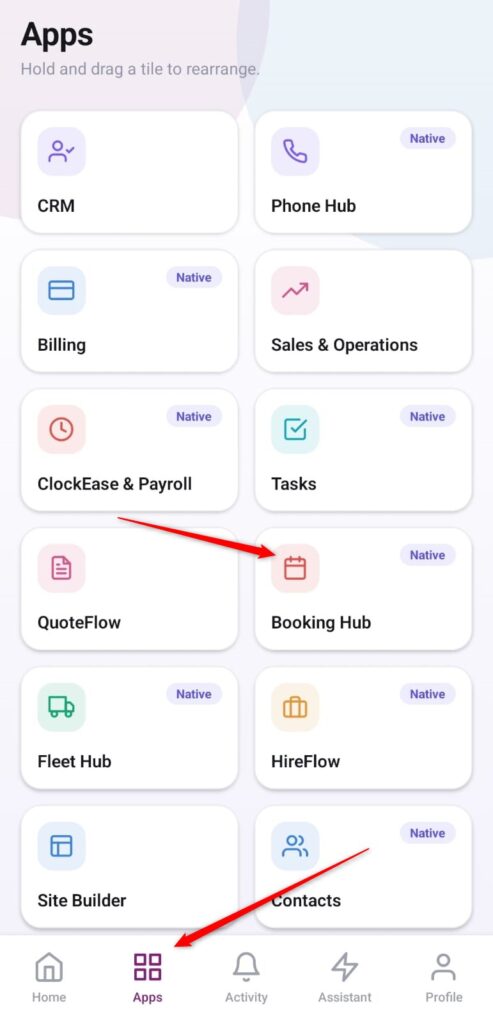
Open the App Directory: On the bottom navigation bar of the application, tap the Apps menu button represented by the four-square layout icon.
-
Access the Booking Center: Within the operational grid checklist, locate and tap the Booking Hub module card.
-
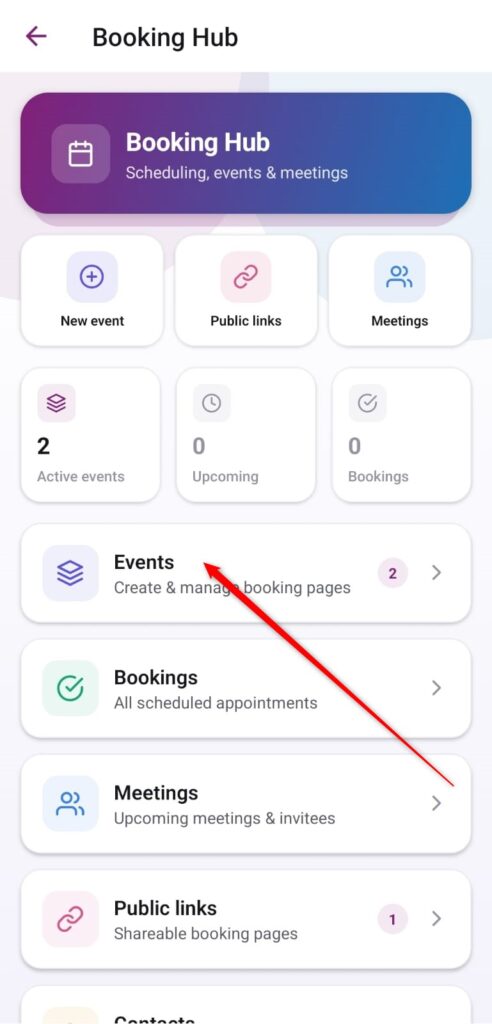
Open the Booking Pages Section: From the primary hub control panel dashboard, select the master management row labeled Events (Create & manage booking pages).
-
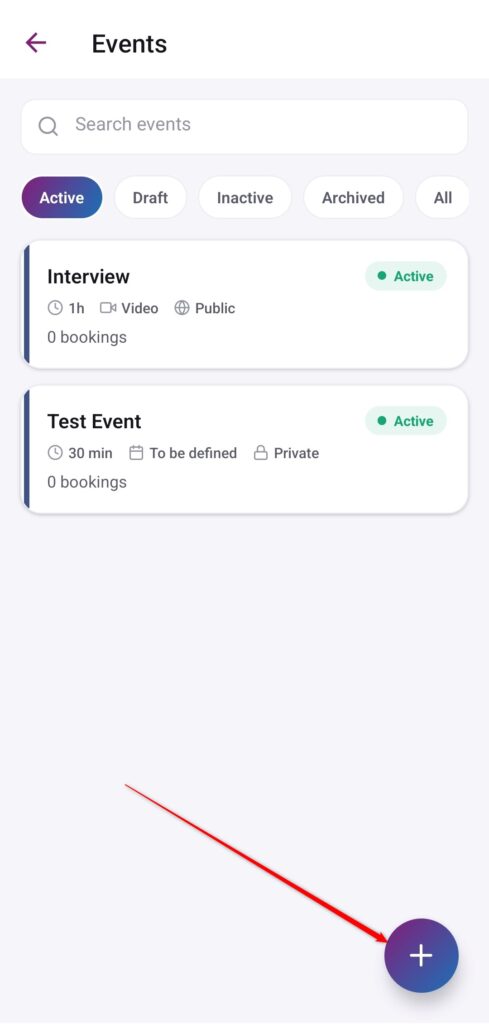
Launch a New Entry Form: Inside your general library view, tap the purple floating action button featuring the
+icon situated in the bottom right corner.
-
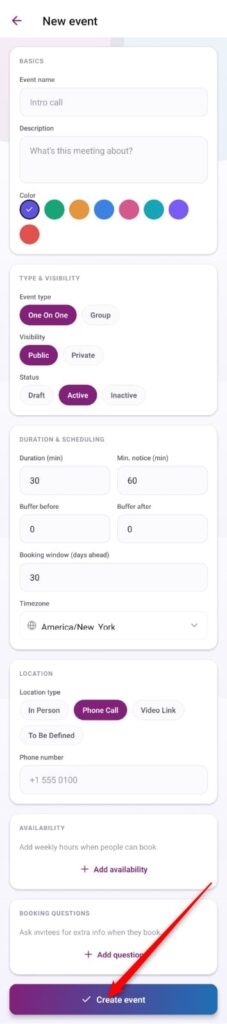
Fill Out Core Information (Basics): Under the initial block field, input a distinct headline label in Event name (e.g., “Intro call”), write an optional agenda layout in Description, and select a Color circle tag to classify it in your scheduler.
-
Assign Type and Visibility Parameters: Under the Type & Visibility cluster card, select whether the structure format is single-user (One On One) or collective (Group). Choose between a public or private tracking access option and toggle the layout phase status to Active.
-
Configure Duration and Scheduling Blocks: Under the Duration & Scheduling space fields, insert the meeting timeframe length in minutes (Duration), minimum notice requirements (Min. notice), cushion time constraints (Buffer before/after), rolling available booking window parameters, and your current target time zone location.
-
Set Up a Targeted Location Type: Designate the channel media properties under Location type (such as an In-Person meeting, Video Link, or Phone Call). If selecting Phone Call, input the appropriate digits inside the phone number parameter field.
-
Append Availability and Intake Questions: Customize your operational pipeline by appending weekly active work hours using + Add availability, and use the + Add question selection link if you require custom query fields to harvest data from clients during booking.
-
Finalize and Emit the Event Page: Review all configured variables on your screen and tap the prominent purple baseline action bar labeled Create event to publish your scheduling link.