Categories
 Profile
 Contacts
 Notes & Cloud Files
 CRM
CRM Billing
 Quote Flow
 Tasks
Tasks ClockEase & Payroll
 Phone Hub
 Booking Hub
 Fleet Hub
 HireFlow
 Cybix AI
 Connect
 Administration
 Sales & Operations
 Video Meeting
- Cybix App
- About the development company.
- About my Membership
-
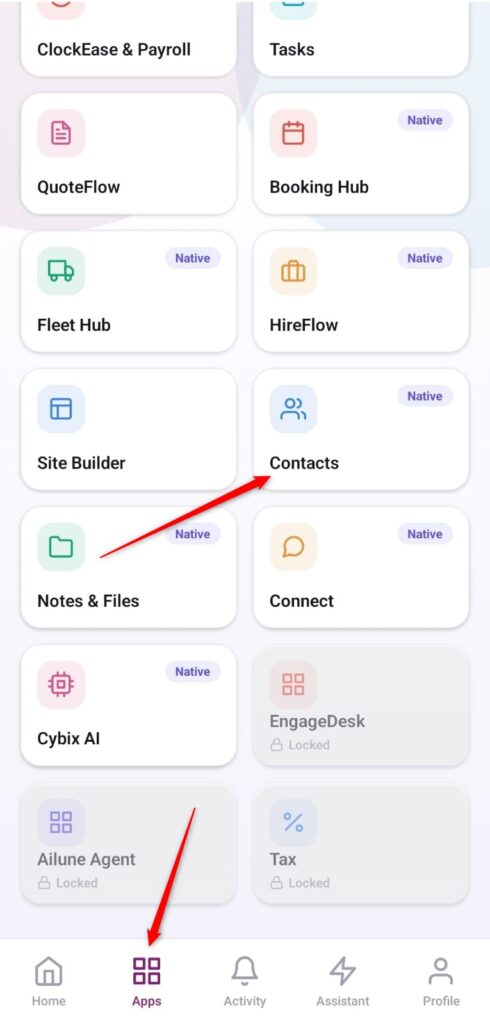
Open the App Directory: On the bottom navigation bar of the application, tap the Apps menu button represented by the four-square layout icon.
-
Access the Contacts Workspace: Within the active operational checklist grid, locate and tap the Contacts module card.
-
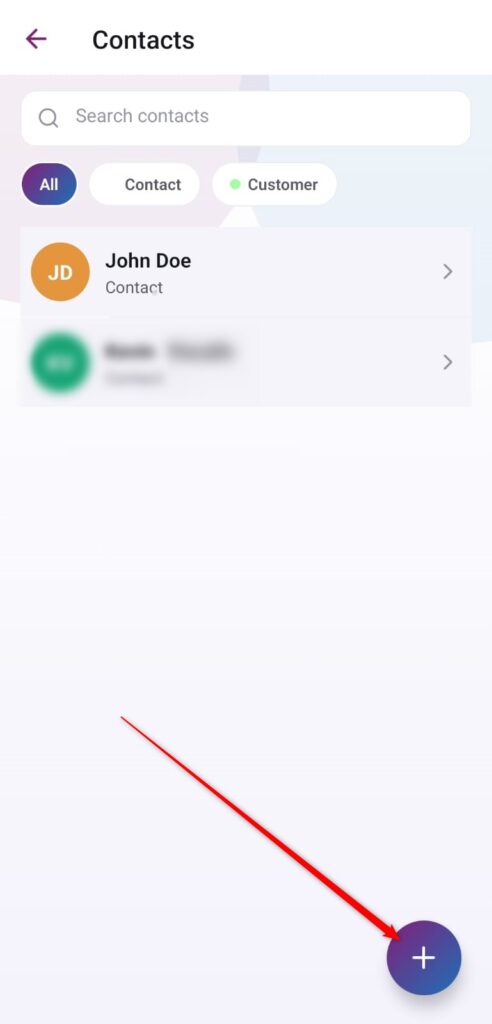
Launch a New Profile Form: On your main library database workspace view, tap the purple floating action button featuring the
+icon in the bottom right corner.
-
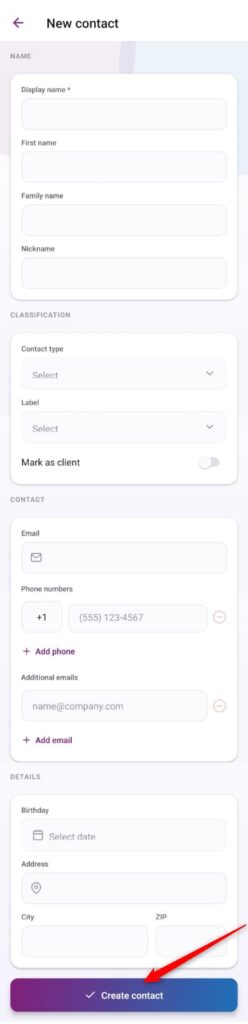
Input Core Identity Fields (Name): Fill out the mandatory profile headline under Display name (indicated with an asterisk). You can optionally append tracking text data inside the First name, Family name, and Nickname entry inputs.
-
Configure Target Parameter Tagging (Classification): Under the Classification card cluster, tap the respective dropdown panels to determine your Contact type and tracking Label. Toggle the Mark as client switch active if this entry acts as a buyer.
-
Fill Out Media Communication Inputs (Contact): Type the baseline inbox handle under Email, select your country code, and input the target digits in Phone numbers (you can use + Add phone to chain multiple active lines), and append backup routing tags under Additional emails.
-
Append Address and Demographic Info (Details): Scroll to the lower setup card segment to assign a calendar milestone tracking date in Birthday, and type accurate postal parameters inside the Address, City, and ZIP fields.
-
Commit and Save the Contact: Review your completed fields across the screen layout and tap the prominent purple action bar at the bottom labeled Create contact to finalize the entry logging.