Categories
 Profile
 Contacts
 Notes & Cloud Files
 CRM
CRM Billing
 Quote Flow
 Tasks
Tasks ClockEase & Payroll
 Phone Hub
 Booking Hub
 Fleet Hub
 HireFlow
 Cybix AI
 Connect
 Administration
 Sales & Operations
 Video Meeting
- Cybix App
- About the development company.
- About my Membership
Follow these steps to generate and log a new invoice for your clients directly from your mobile interface:
-
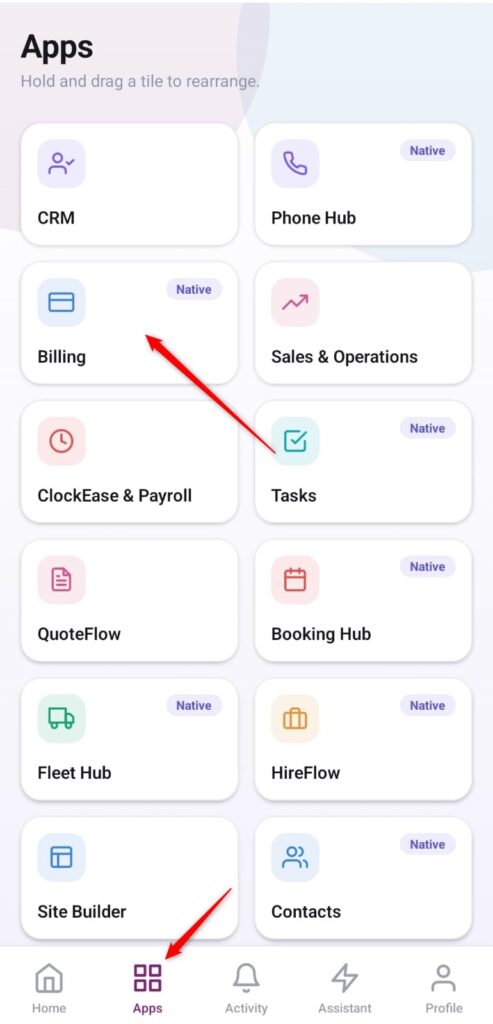
Open the App Directory: On the bottom navigation bar of the application, tap the Apps menu button (represented by the four-square icon).
-
Access the Billing Center: Within the grid checklist, locate and tap the Billing module card.
-
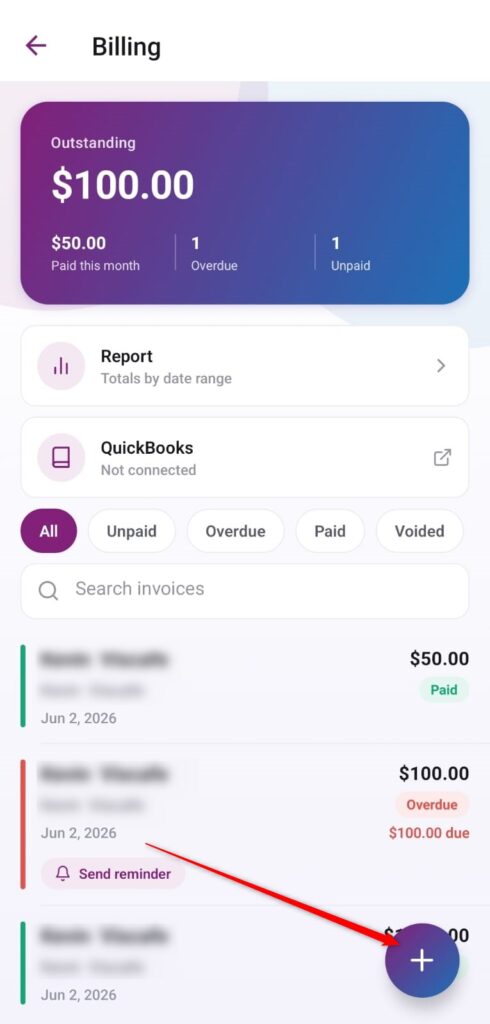
Start a New Invoice: On the primary billing workspace dashboard, tap the purple floating action button featuring the
+icon in the bottom right corner.
-
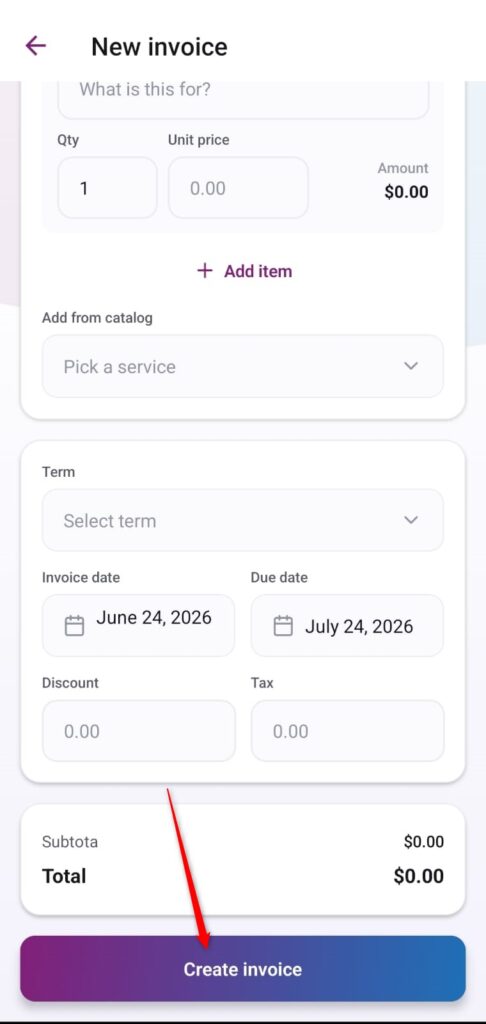
Add Items and Pricing Parameters: Specify the quantity (Qty) and the individual cost (Unit price) of your item. Tap + Add item if you need to build a multi-row statement.
-
Alternatively, utilize the Add from catalog (Pick a service) dropdown selector to instantly import an asset from your saved corporate service catalog.
-
-
Configure Terms and Dates: * Assign payment parameters using the Term (Select term) dropdown field.
-
Verify the creation baseline (Invoice date) and select the payment deadline (Due date).
-
If applicable, input accurate figures in the Discount or Tax fields.
-
-
Finalize and Emit: Review the automated calculations for your Subtotal and Grand Total at the bottom workspace card, then tap the prominent blue Create invoice button to post the document.