Categories
 Agentic Ailune
 Profile
 Contacts
 Notes & Cloud Files
 CRM
CRM Billing
 Quote Flow
 Tasks
Tasks ClockEase & Payroll
 Phone Hub
 Booking Hub
 Fleet Hub
 HireFlow
 Cybix AI
 Connect
 Administration
 Sales & Operations
 Video Meeting
- Cybix App
- About the development company.
- About my Membership
Detailed Guide to Ailune’s Website Channel Configuration
To set up your virtual assistant widget, go to the “Agentic Ailune” section in the sidebar menu and select the “Website Channel” option. The administration console is divided into several strategic configuration tabs that allow you to customize every aspect of the tool before its launch.
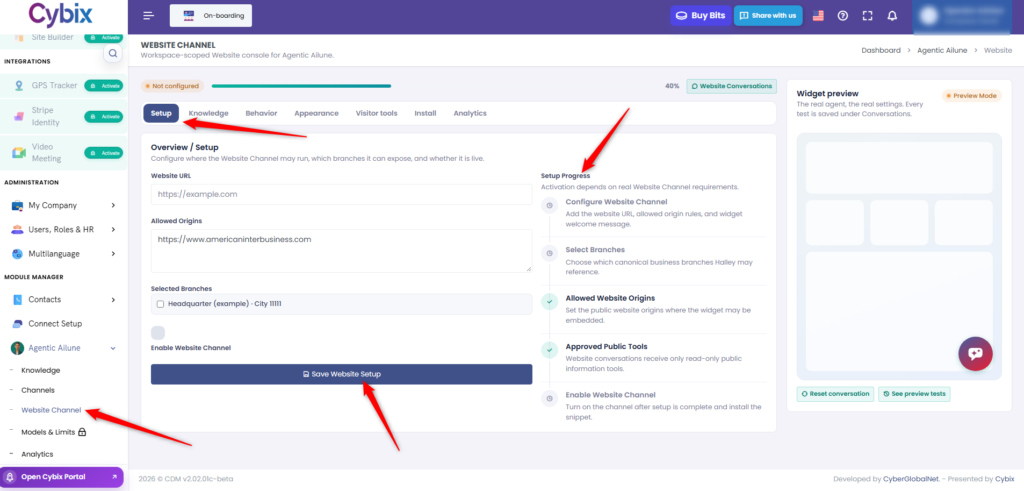
Setup Tab
In this first section, you will establish the essential technical parameters of the widget. The system requires you to enter your platform’s main address in the “Website URL” field and define the security rules in the “Allowed Origins” box, which is an essential step to ensure the chat runs exclusively on the trusted domains you authorize. Additionally, you can link the corporate branches the assistant may discuss, review the overall setup progress, and finally enable the channel by saving the changes.
Knowledge Tab
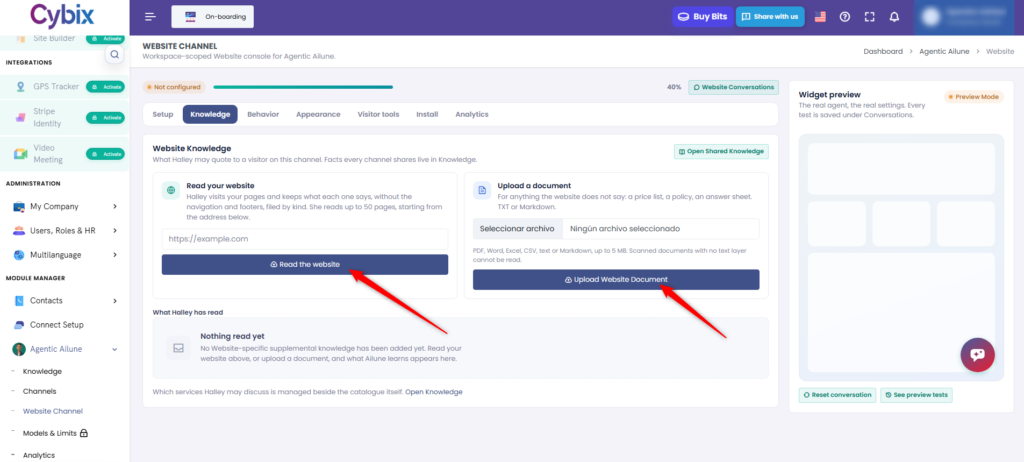
This area is designed to feed the intelligence and data your assistant will handle. You have the option to instruct the system to automatically analyze and memorize your website by entering the URL; from there, the AI can read up to 50 navigation pages to understand your services. On the other hand, for information that is not public on your website, such as price lists or manuals, you can upload files directly from your computer, supporting documents in PDF, Word, Excel, CSV, text, or Markdown formats with a limit of up to 5 MB.
Behavior Tab
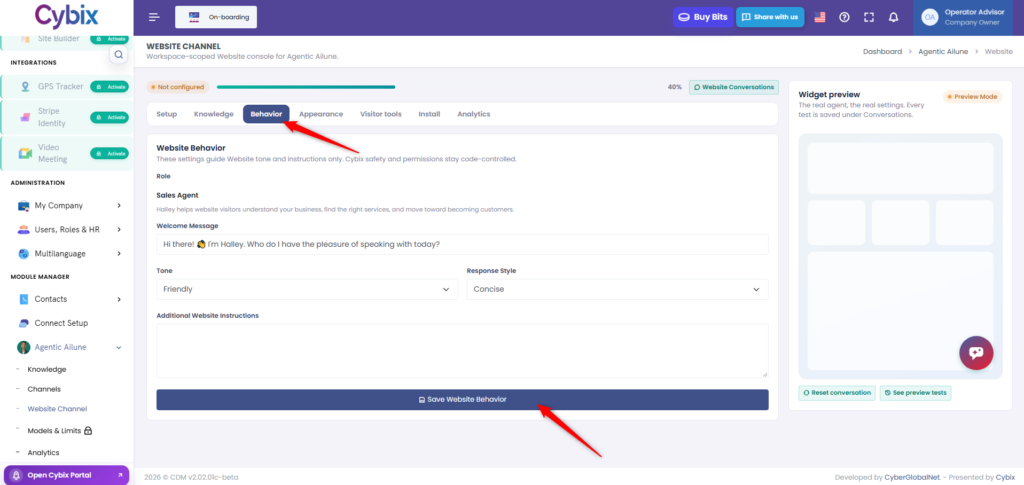
This is where you shape the personality and interaction style of your virtual agent. The platform allows you to assign it a specific role, such as a “Sales Agent”, design the exact welcome message that visitors will see when opening the chat, and define both the conversation tone and response style, allowing it to be concise or more detailed. You also have an extensive text field to provide additional instructions and specific behavioral rules that the assistant must strictly follow during its conversations.
Appearance Tab
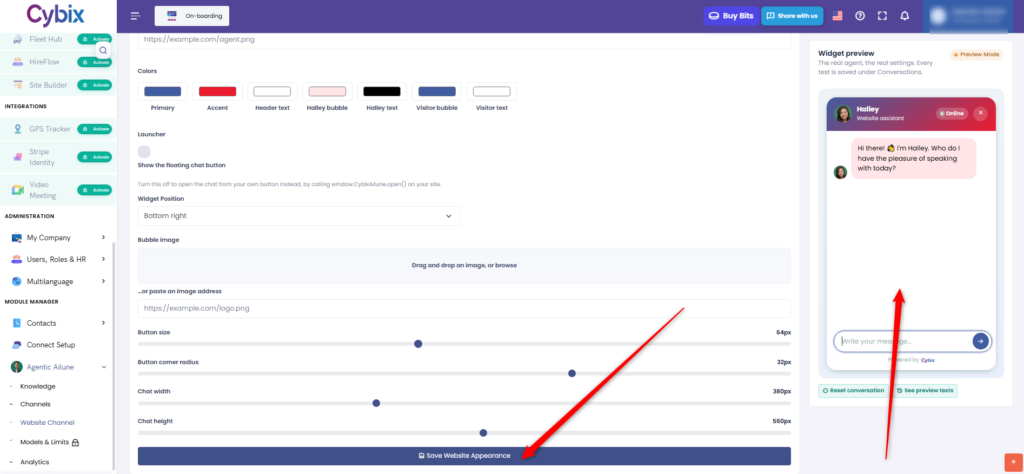
To ensure the chat integrates harmoniously with your site’s design, this section gives you absolute visual control. You can modify the entire color palette, from primary and accent tones to the specific colors of the texts and chat bubbles for both Halley and the visitors. Beyond colors, the panel allows you to change the widget’s screen position, upload a custom image for the floating button, and finely adjust the button size, the corner radius, as well as the overall width and height of the chat window.
Visitor Tools Tab
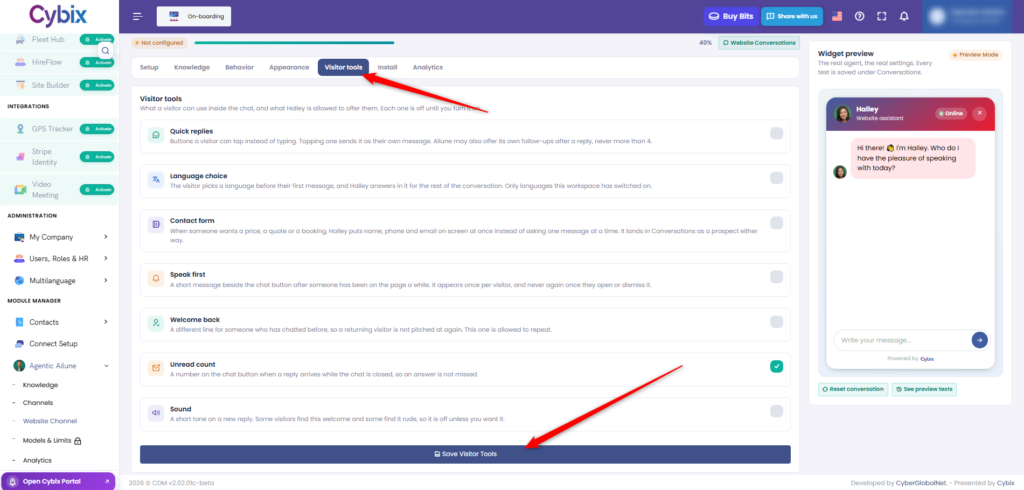
From this section, you can significantly improve the user experience by activating interactive add-ons within the chat. You have switches at your disposal to enable quick reply buttons, allow the visitor to choose their preferred language, and deploy integrated contact forms that automatically collect vital data such as the name, phone number, and email of your commercial prospects. You can also turn on proactive messages to grab attention (“Speak first”), personalized greetings for returning users (“Welcome back”), and visual and auditory indicators to alert about unread messages.
Install Tab
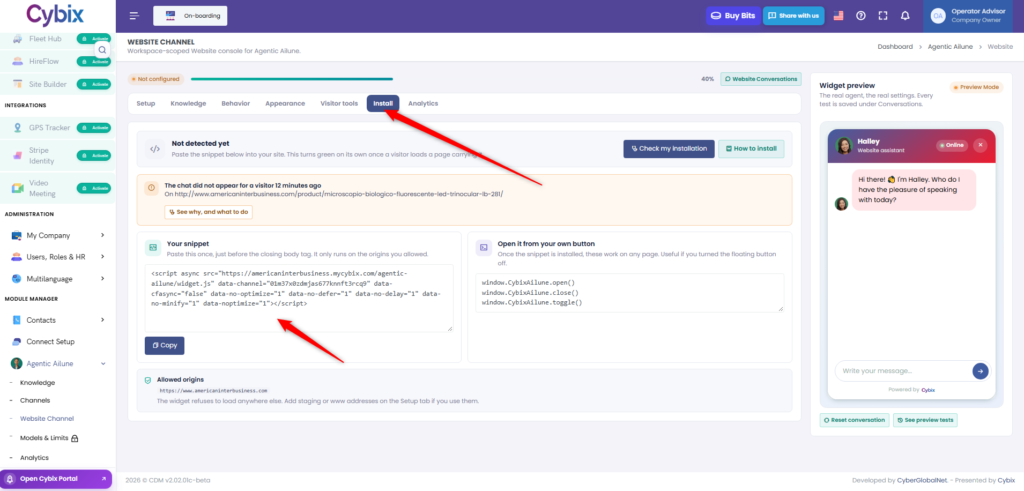
Once you have completed and reviewed all your customization in the previous tabs, this last section will provide everything you need to take the widget live. The system automatically generates a JavaScript code block, or “snippet”, which you must copy and paste into your website’s source code. In addition to providing the code, this screen allows you to check the installation status, confirm the list of allowed domains where the chat has permission to load, and offers the necessary commands in case you decide to open the chat using your own website button instead of the default floating icon.