Categories
 Profile
 Contacts
 Notes & Cloud Files
 CRM
CRM Billing
 Quote Flow
 Tasks
Tasks ClockEase & Payroll
 Phone Hub
 Booking Hub
 Fleet Hub
 HireFlow
 Cybix AI
 Connect
 Administration
 Sales & Operations
 Video Meeting
- Cybix App
- About the development company.
- About my Membership
Follow these steps to successfully fill out the creation form and log a new task or operational assignment from your mobile device:
-
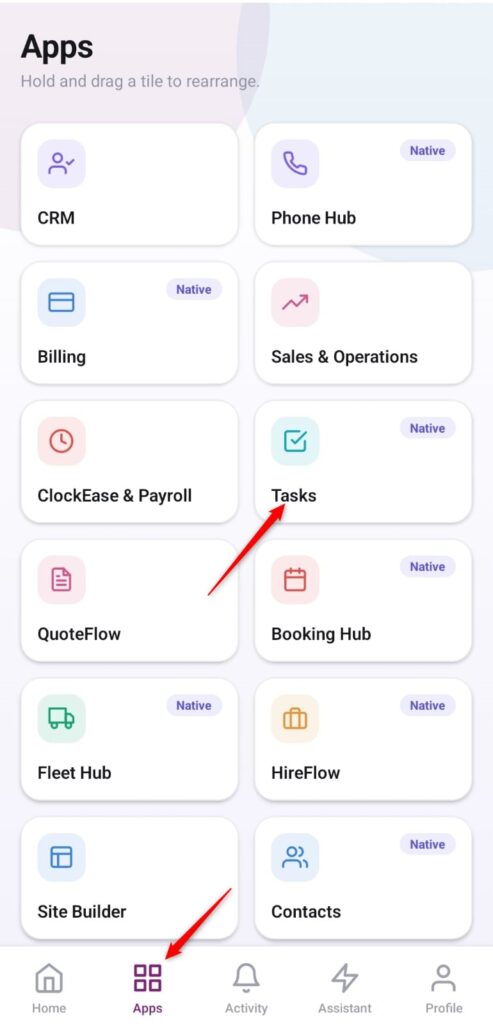
Open the App Directory: On the bottom navigation bar of the application, tap the Apps menu button (represented by the four-square icon).
-
Access the Tasks Workspace: Within the grid checklist, locate and tap the Tasks module card.
-
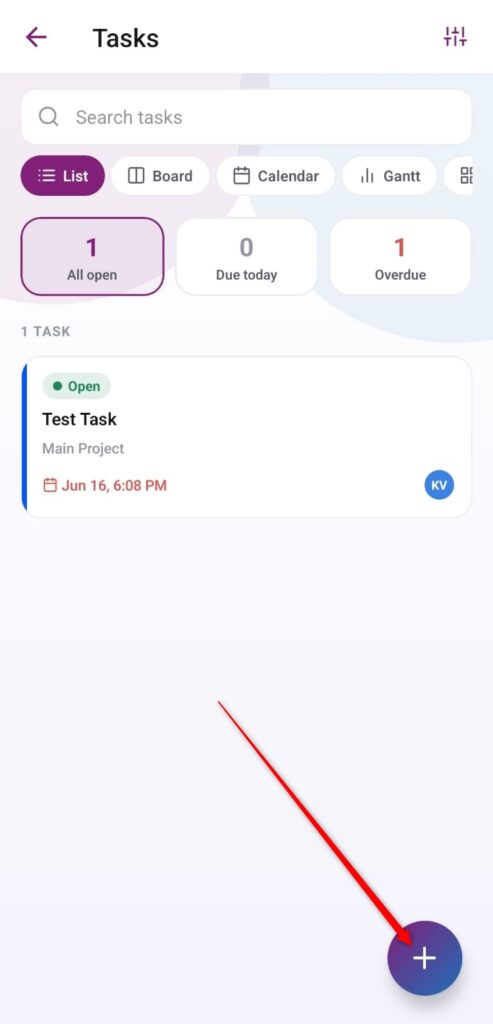
Start a New Task: On the primary project management dashboard, tap the purple floating action button featuring the
+icon in the bottom right corner.
-
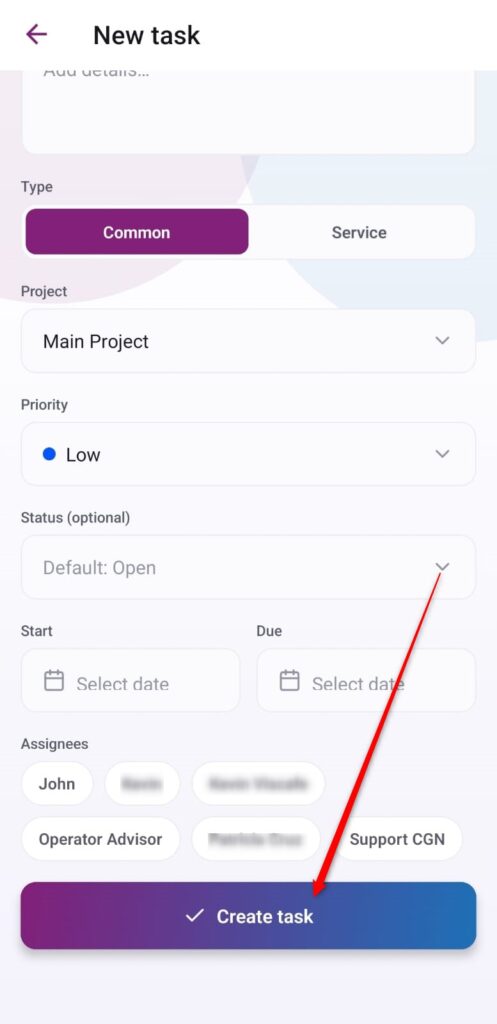
Fill In Core Information: At the top of the form area, input your definitive task headline title and add optional context details within the description text block field.
-
Configure Form Parameters: Scroll down to arrange the specific assignment attributes displayed in the layout view:
-
Type: Select whether this is a regular assignment (Common) or an active execution workflow (Service).
-
Project: Tap the dropdown selector to link the action to a corporate master file (e.g., Main Project).
-
Priority: Categorize the urgency level requirement (such as Low, Medium, or High).
-
Status (optional): Adjust the initial board stage if needed or leave it on its default benchmark (Default: Open).
-
Dates (Start / Due): Use the dual calendar-picker cards to establish clear start times (Start) and strict final completion deadlines (Due).
-
Assignees: Tap the quick-selection name labels (such as John, Operator Advisor, etc.) to designate which team members are responsible for this assignment.
-
-
Finalize and Create: Review your field adjustments and tap the prominent purple action bar at the bottom labeled Create task to save and dispatch the assignment.